Tuesday, August 25, 2009

Reduce HDR sky noise

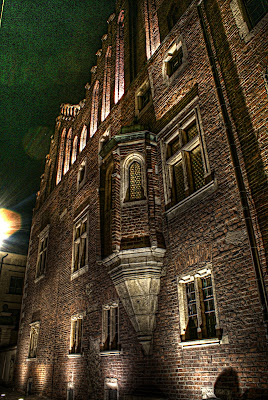
Often while shooting for HDR at night or in the afternoon when the light is low there is an unpleasant side effect. The sky (if present) is extremely noisy. Case in point (click for large version):


(Note that in this picture I applied an unsharp mask to enhance the details on the building because tone mapping tends to create blurry results, and so the noise is a bit exaggerated but the scene was pretty noisy even without the unsharp mask)

To fix the sky noise I came up with a pretty simple solution. I choose one of the three original exposures for the HDR :


I chose the most exposed frame so that I will have the most well lit sky. I then select the sky only, by selecting a color range, selecting the sky and setting my fuzziness to a satisfactory level :


I then copy the sky and paste into a new layer over my HDR. This is the result :
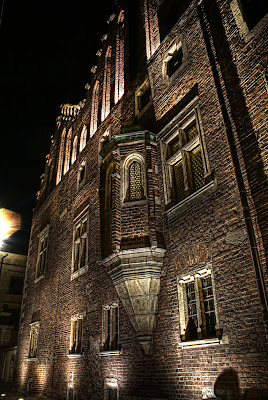

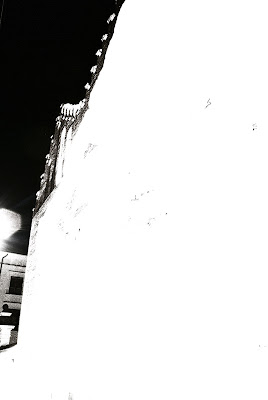
The result is already looking good but it has one drawback. The overlay also darkened the shadow places of the HDR. This can be fixed by simply erasing the parts of the overlay you don't want (keep only the noisy parts in). These are the original and final version of the overlay (white parts are transparent) :


Finally here is my final HDR with the final sky overlay.


Sunday, August 2, 2009

Time Lapse Photography

First post in along time. What was the cause? This. I recently purchased this remote control for my camera which i highly recommend. It's cheap and has very neat features. Two downsides only : First, it is not wireless but i can i live with that. Second the minimum exposure time you can set for your camera from the remote is 1'. You can of course use the camera setting and override the setting on the remote but when you want to take different exposure steps and it's daylight you cannot adjust the shutter time to the ones you need without handling the camera (and thus moving it).

The main reason i bought it though was the time lapse capabilities. As a first test i shot a simple view of the sky.

The process you want to follow is easy. Determine first of all the time frame for your animation. You might for instance want to shoot 12 hours of a day from dusk till dawn. Once you figure out this time frame you calculate the amount of seconds it contains. For the example i gave you it's 12 hours * 60 minutes (per hour) * 60 seconds (per minute) = 43200 seconds.

After that you need to determine how long you want your video to last. Let's say you want your video clip to last 2 minutes. Again you figure out the seconds in that period. In this case 2 minutes * 60 seconds = 120 seconds.

Lastly you need to figure out the frame rate of your video. In the States that's usually 30fps while in Europe it's 25fps. Of course you can choose whatever you wish. You can have extra fast or even extra slow frame rates. Let's go with 25 for this example.

So our video will consist of 25 frames/second * 120 seconds = 3000 frames.

Now that we know how many frames we are going to shoot and the time frame for those we can calculate how often a new frame must be photographed. Thats 43200 seconds / 3000 frames = 14.4 seconds.

That means that we must set our remote to take a new picture every 14.4 seconds (unfortunately the model i bought only has a setting for integer values and so i would have to choose between 14 and 15 seconds which would yield similar results)

You then set your exposure and start taking pictures. Note that you have to set your camera to manual mode and adjust the settings correctly.

One last note about shooting time lapse at night. I tried shooting the stars . In the very dark conditions when i shot it, i realized that each frame had to be exposed for 30 seconds to get a bright enough result. So in this case the exposure time for each frame will dictate your other settings (such as how often you will shoot new frames and how long the animation will last).

The last step is to compile a video. You can use a lot of different programs (some free some not. Google and you'll find many) but for my very simple first attempts i used Picasa 3 which has a time lapse feature. The main reason i used that was that i had it installed, it is easy and i was bored to install another program. The only downside is the .wmv files it produces :D

These are my first results :


Monday, April 27, 2009

HDR Panorama

I decided to give an HDR Panorama a try and i think the results are pretty nice. (for the orignal panorama check out this)

I went for the dark, Lord of the Rings poster like, look here so please be gentle :D

Wednesday, April 22, 2009

Easter in Drama City

Easter provided some good photographic opportunities in my colorful home town Drama.

And despite it's dramatic name the city is really beautiful. (click for larger version) :

Tuesday, April 14, 2009

Work the Exposure 3

New kid on the block. Finally I bought a new camera. Sony A200 (with Super Steady shot by the way).

This time I will create an effect commonly created by photo editing software like Photoshop. Some people call it Zoom Blur.

To do this purely with your camera, simply decide on a shutter speed appropriate for the effect. What you will do is allow some initial time for the image to be imprinted on the sensor and the remaining time you will simply zoom out while the shutter is still open. Depending on the strength of the effect you are after you might want a shutter speed of a small fraction of a second up to several seconds. In my example I wanted a rather subtle effect so I chose a shutter speed of 1/4.

After you decide on a shutter speed all you have to do is adjust the ISO setting and the f stop to something that will provide the correct exposure for your picture. In my case that was ISO-400 and f/5.6.

All that is left is to simply take the picture and before the shutter closes, zoom out the amount you want. what you will have in the end is the Zoom Blur effect.

Friday, January 30, 2009

Work the Exposure 2

Last time i discussed an interesting effect you can achieve by using manual shutter speeds with your camera.

This time i will discuss another, veeery well known, "trick" you can do by manually adjusting how long your shot is exposed to light and it is sometimes known as "light streaks".

It usually works at night when the cars lights are very bright in relation to the background. You set your camera's shutter speed to something like 15-30 seconds and then adjust the ISO settings and the F stop to a value that will give you a well exposed background (depends on the shutter speed you set). A tripod is essential for this because you will be exposing for several seconds and the slightest movement will create blurry effects on the shot.

The result is very well known as you can see:

Wednesday, January 21, 2009

Work the Exposure

One of the very cool things you can do with your camera has to do with exposing the shot to your liking. Manual exposure is a very power tool, a tool with which you can achieve a variety of results. This post is about one of them.

You are in a dark place and you see something very interesting that you want to photograph. But its VERY dark. Very very dark. in fact it's THIS dark:

(Note: this is the actual luminosity my eyes saw when i took this picture. Also note that there is NOTHING interesting in this picture :P)

No problem. You set your trusted tripod (if you have one) and set the ISO level at a high level (1600 in this case). Then you set manual shutter speed. You know, the one were you have to keep your finger on the button for as long as you want your shot to be exposed. And you keep it there for a long time. (In this case 358.8 seconds). The result is similar to a shot taken in the afternoon. (These shots were taken at 4 am).


Pretty amazing no? I actually wanted to achieve a look similar to a shot taken at noon but my finger got tired :D It helps if you have a remote control. (Mental note: need to buy one of those)

This was the first interesting effect you can achieve with adjusting the exposure manually. Other will follow so stay tuned.