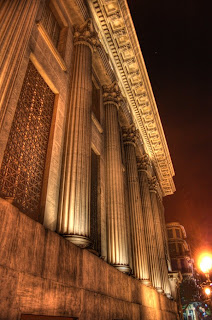
Have you seen the amazing look you can achieve with the so called HDR technique but don't have the necessary equipment to shoot the photographs required or you want to give that look to an already existing photograph you have but have only one exposure shot? Don't worry, with some tweaking you can achieve the same effect (to some level) with a normal LDR (normal jpg) picture.
For this technique you need Photoshop (or another photo editing software with similar settings) and Photomatix (but any software for tone mapping will do)
First you will need the picture you will be editing:

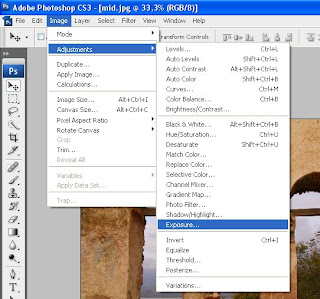
This picture was shot in Florina Greece in the lake Prespa. In the normal HDR procedure , you shoot 3 pictures of the same subject, one underexposed, one normally exposed and one over exposed. We have the normal exposure so we will have to fake the other two. Open Photoshop and load this picture. Now go to Image -> Adjustments -> Exposure :
 On the window that pops up choose exposure -1 and offset -0,05 :
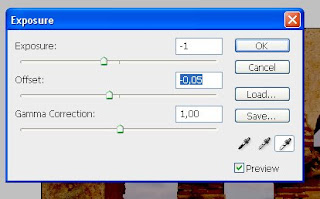 This will create the fake underexposed image. Save this somewhere and revert to the normally exposed one. Now we will fake the overexposed image. Do the same but now the settings will be Exposure +1 and Offset +0,05 (Please note: Do this on the original picture, not the one you just saved):
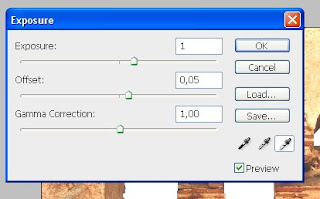 Save that somewhere as well and close Photoshop. Now that you have all the exposures needed, open Photomatix and choose Create HDR image :
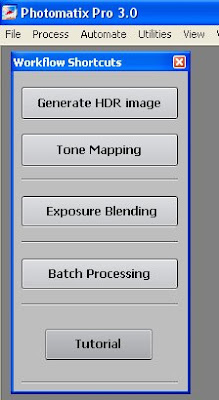
On the window that pops up choose Browse and load all three exposures:

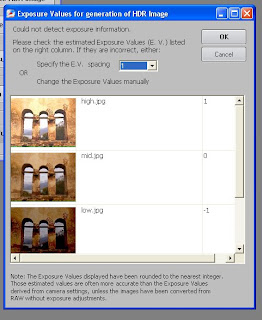
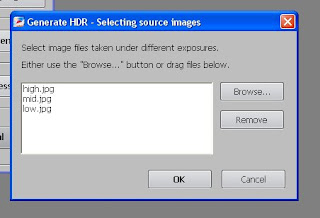 Press OK. On the new window that pops up select EV spacing 1 (note about HDR: In normal circumstances you shoot your pictures with an EV spacing of 2. But there is not enough dynamic range in a normal jpg and choosing -2 and 2 when faking the exposure produces very dark and very bright, incorrectly exposed images. So for the sake of creating something that is pleasing to the eye and only that, we choose 1 EV spacing) :
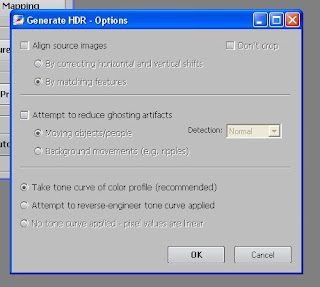
 Now when you press OK you will get a dialog with options. Make sure that "Align source images" is not checked (since our images are the same and so are alligned) and "Attempt to reduce ghosting artifacts" is also unchecked (for the same reason). Press OK:
 After some processing you will get a very ugly picture. :D Don't worry. This is the "negative HDR" as it's called. Press "Tone Mapping":
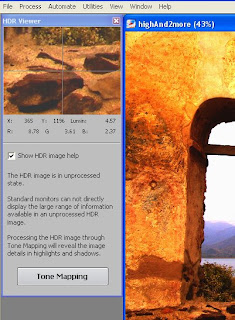 I will not go through the various options here (there is an excellent tutorial on that here). For the sake of reproducing my outcome I will give you the settings I used:
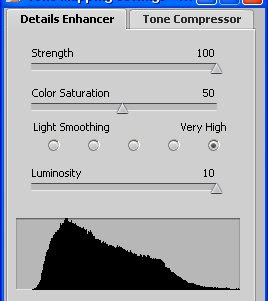
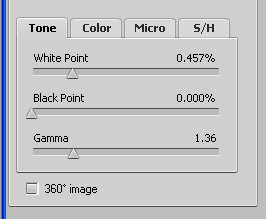
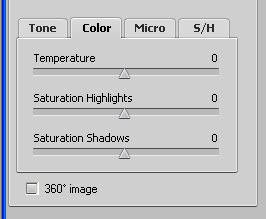
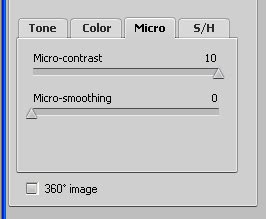
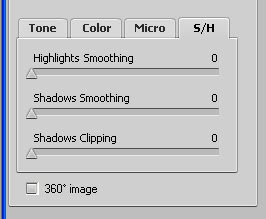
Be sure to play around with the settings until you see something you like. Once you are done you press "Process" and then save your tone mapped image. :D I hope you liked my tutorial. Here is the final result:


6 comments:
Loved the final result! Great tutorial. Keep up the good work!
*ditto* ...great tutorial. I was actually thinking about how to go about it just last week, this will save heaps of anguish! mike
Very nice tutorial. So far I have had some trouble doing single-EX HDR processing... This has inspired me to continue experimenting.
Great explanation, thanks. I've read many others on this subject and you are the clearest, not to mention your great results.
Great tutorial, I will try it on some of pictures. windows hosting | Website Hosting
wonderful tutorial. it is really a great transformation. thanks.
Post a Comment